Ever since I saw this great Free Clutch Sewing Pattern Tutorial I knew I had to try it. The tutorial has these great pictures and explanation so it looked pretty easy.
Ingredients:
- Fabric - 1/3 yd each of outer fabric, inner fabric, and duck canvas
- Matching thread
- Sewing machine or a lot of patience
- Printed (and taped together) tutorial pattern
- Magnetic clasp - mine is kinda ugly because it is the basic one, you can find cute snaps if you want
I went to a local fabric store called Bolt Fabric Boutique. It was this quaint little store on Alberta in Portland. I loved it at once. The fabric selection may not be as wide as Fabric World (a HUGE fabric store) but the choices were everything I wanted. All in all it was very "Portland," whatever that means. I was only planning on making one purse but of course I fell in love with three patterns. Typical. So I went home with a ton of fabric. With everything I spent only $30! That may seem like a lot, but I got way too much, seriously. Also this local place, Bolt, has a basket of 1/4 yd pre-cut pieces for $2 so that is a great deal for all us thrifty types.
The pattern calls for 1/3 yd of everything but 1/4 yd is definitely enough...unless the lady gave me way too much fabric on accident.
So I came home and right away started on my project. First I lined up the fabrics and cut out one of each with the online pattern.
After they are all cut out you baste (loosely sew together) the duck canvas to the exterior fabric (on the wrong side).
I bought directional fabric which means it has a direction... So basically there is a direction I want the fabric to go to look the way I want. This type of pattern is an example. You do not need to get fabric like this.
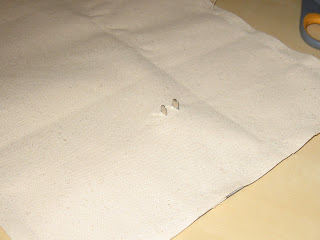
Now I attached the magnetic snap on the exterior part. Make sure to put it on the side you want. I wanted the right side (see above pic) to be the top of the purse so I put the snap on the other side. You measure to find the center and then put it 2.75" from the end.
The snaps come with instructions. Basically you line up where you want it to go and press the end of the snap against the fabric, leaving a dent. Then with sharp fabric scissors you clip the indentations and push the prongs through. Then you put another piece of fabric behind it (to support it), put the other metal piece on, and push the prongs to the sides.
You then do this on the interior fabric too except you want it 1.25" from the end.
Now you put the wrong sides together with the snaps on opposite sides and sew it together with a 1/2" seam. Make sure to leave a 4" space at the end of the stitch so you can turn it right side out.
Cut off the corners to decrease bulkiness (it is a word).
Then turn it right side out through the hole you left.
Pin together the hole. Then fold up the bottom of your purse so you have approx 4.5" at the top (blue)
Now sew across both sides and the top so you have closed the hole and the sides.
Here is the finished product. Hopefully this illustrates "directional fabric." I wanted the pattern to continue down the face of the purse so I used fabric with a direction. Make sense?
It turned out pretty cute! It looks a bit lopsided in the picture but I still need to iron it.
Thanks Ali Foster for your pattern!


Wow so lovely, i wish i know how to use a sewing machine, for sure i'll be doing more items then. LSG Office Products
ReplyDelete